The Compass: Your Guide to Adventure

Have you ever wondered how ancient mariners navigated vast, open oceans or how explorers found their way through uncharted wilderness? For centuries, one remarkable instrument has been the trusted guide for adventurers, sailors, and travellers alike: the compass. This simple yet ingenious device has shaped history, enabled discovery, and continues to be an essential tool for anyone looking to explore the great outdoors.

Mariner's Compass

Let’s uncover the fascinating story of the compass, from its mysterious origins to its modern-day uses. Discover how this timeless tool works, what to look for when choosing one, and how you can use it to embark on your own adventures.

What is a Compass?

At its heart, a compass is a straightforward navigational instrument that shows direction relative to the geographic cardinal points. A standard magnetic compass contains a magnetised pointer—the needle—that aligns itself with the Earth’s magnetic field. The “north” end of this needle points towards the Earth’s magnetic North Pole, giving you a reliable and constant reference point to find your bearings.

Compasses come in various forms, from simple, pocket-sized devices to complex instruments used in ships and aircraft. But they all share the same fundamental purpose: to help you find your way.

Why Use a Compass?

In an age of GPS and digital maps on our phones, you might think the traditional compass is obsolete. However, this classic tool offers several unique advantages, especially for those who love to venture off the beaten path.

  • Reliability: A compass doesn’t need batteries or a satellite signal to work. Whether you’re deep in a forest, high on a mountain, or in a remote area with no reception, your compass will always be a dependable guide.
  • Durability: Most outdoor compasses are built to withstand tough conditions. They’re often waterproof, shock-resistant, and can handle extreme temperatures, making them a rugged companion for any expedition.
  • Skill Building: Learning to use a map and compass is a rewarding skill. It deepens your connection with the landscape, improves your spatial awareness, and builds your confidence in the outdoors. It’s a true art of navigation that connects you with generations of explorers.
  • A Perfect Backup: Even if you prefer using a GPS, a compass is a lightweight and essential backup. Technology can fail, but a magnetic compass is a failsafe tool that can help you get back on track.

The Journey Through Time: A History of the Compass

The story of the compass is a tale of innovation that spans continents and centuries. Its invention wasn’t a single event but a gradual evolution of ideas.
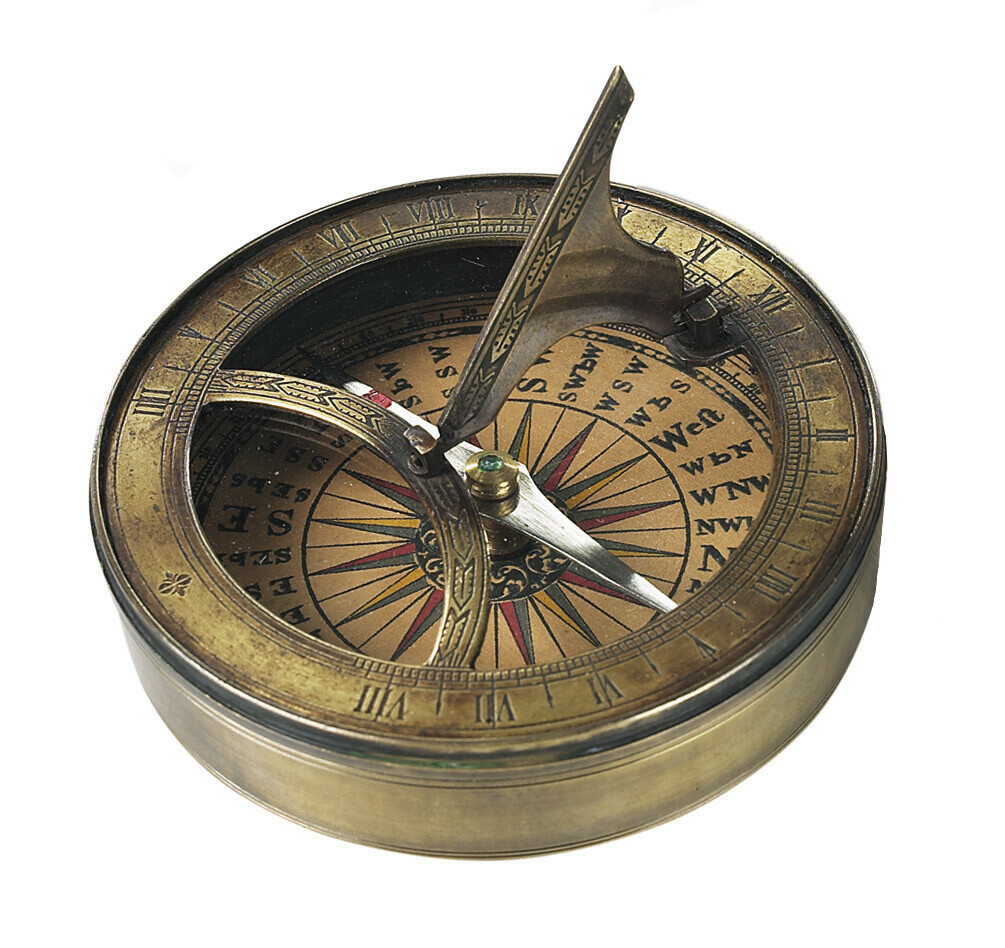
18th Century Design Sundial & Compass

Ancient Chinese Origins

The journey begins in China during the Han Dynasty, around the 2nd century BC. The earliest compasses weren’t used for navigation but for divination and feng shui. These first instruments, known as “south-pointers,” were often spoon-shaped ladles made of lodestone (a naturally magnetised iron ore) placed on a bronze plate. When the spoon was spun, it would eventually come to rest pointing south.

By the Song Dynasty (around the 11th century), the Chinese had started using the compass for navigation at sea. They discovered that a magnetised needle floating in a bowl of water was a far more practical design for ships. This innovation allowed sailors to navigate the oceans with greater accuracy, even on cloudy days when the stars were hidden.

Spreading to Europe and the Middle East

The concept of the magnetic compass travelled along the Silk Road and maritime trade routes, reaching the Middle East and Europe by the 12th and 13th centuries. European sailors quickly adopted the device, which revolutionised their ability to explore. The compass was instrumental during the Age of Discovery, enabling explorers like Christopher Columbus and Vasco da Gama to embark on their world-changing voyages.

Early European compasses were simple: a magnetised needle placed on a pin inside a wooden box with a wind rose, a design that showed the cardinal directions. Over time, improvements were made, such as placing the needle in liquid to dampen its movement and make it more stable on rough seas.

Choosing Your Compass: What to Look For

Ready to get your own compass? With so many options available, it’s helpful to know what features matter most. Here are a few things to consider when buying a compass for hiking and outdoor adventures.

  • Baseplate Compass: This is the most common and versatile type for hiking. It features a clear, flat base that you can place on a map, making it easy to take bearings.
  • Liquid-Filled Housing: Look for a compass where the needle is housed in a liquid-filled capsule. The liquid (usually a type of oil or alcohol) steadies the needle, allowing it to settle quickly and provide a stable reading.
  • Declination Adjustment: The Earth’s magnetic north and true north (the geographic North Pole) are not in the same place. This difference is called declination. A compass with adjustable declination allows you to set it for your local area, making navigation with a map much simpler and more accurate.
  • Sighting Mirror: More advanced compasses often include a sighting mirror. This feature allows you to see the compass dial and a distant landmark at the same time, which helps you take more precise bearings.
  • Luminescent Markings: If you plan to navigate in low-light conditions, such as at dawn or dusk, choose a compass with glowing markings on the needle and direction points.

How to Use Your Compass

Learning to use a compass is an exciting step into the world of traditional navigation. Here’s a simple guide to get you started with a baseplate compass and a map.

1. Orient Your Map

First, you need to align your map with the world around you.

  • Place your compass flat on your map.
  • Adjust the declination on your compass if it has that feature.
  • Rotate the map and compass together until the north end of the magnetic needle aligns with the “N” on the compass dial.
  • Your map is now oriented to true north. The features on the map should now correspond with the landscape around you.

2. Take a Bearing from the Map

Let’s say you want to walk from your current location (Point A) to a landmark on the map (Point B).

  • Place your compass on the map so the long edge of the baseplate connects Point A and Point B.
  • Make sure the direction of travel arrow on the baseplate points from A to B.
  • Hold the baseplate steady and rotate the compass housing until the orienting lines inside the housing are parallel with the north-south grid lines on the map. Ensure the “N” on the dial points to the north on your map.
  • The number on the dial that aligns with the direction of travel arrow is your bearing.

3. Follow Your Bearing

Now, it’s time to follow that bearing in the real world.

  • Hold the compass flat and level in front of you, with the direction of travel arrow pointing away from you.
  • Turn your body until the north end of the magnetic needle is inside the orienting arrow in the compass housing.
  • The direction of travel arrow now points towards your destination. Pick a landmark in that direction (like a distinctive tree or rock) and walk towards it. Once you reach it, repeat the process to stay on course.

Your Adventure Awaits

The compass is more than just a tool; it’s a symbol of exploration, discovery, and self-reliance. By learning to use it, you unlock a deeper understanding of the world around you and gain the confidence to forge your own path.

So, why not pick up a compass and a map of your local area? Start with small adventures in a familiar park or nearby trail. Practice taking bearings and orienting your map. Before you know it, you’ll be ready to navigate new landscapes and discover the incredible places waiting just beyond the horizon. The journey is yours to command.
For Daily Inspiration Follow Us on Instagram 💙

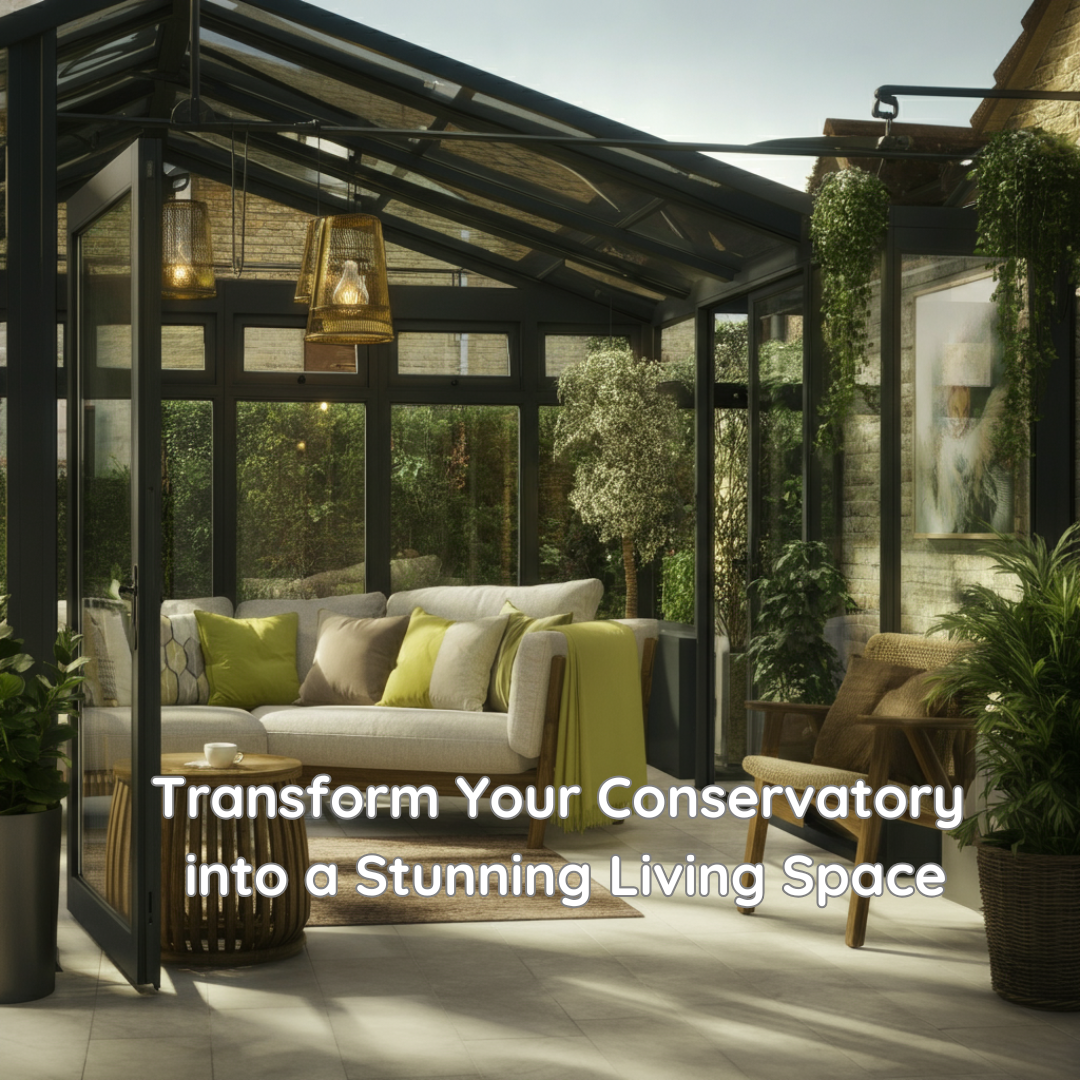
Create a Stunning Conservatory Living Space

Your conservatory holds incredible potential as one of the most versatile rooms in your home. This glass-wrapped sanctuary can become anything from a tranquil reading nook to an entertaining hub that seamlessly blends indoor comfort with outdoor beauty. Whether your conservatory currently serves as storage space or you’re looking to refresh its design, 2025 brings exciting trends that will help you create a space you’ll love spending time in.

Modern conservatory design has evolved far beyond the traditional sunroom filled with wicker furniture and houseplants. Today’s approach focuses on creating multi-functional spaces that work year-round, incorporating contemporary design elements whilst celebrating the unique architectural features that make conservatories so special. The key lies in balancing comfort, style and practicality to create a room that truly enhances your lifestyle.

Essential Furniture for Your Conservatory

Seating That Works All Year Round

The foundation of any well-designed conservatory begins with comfortable seating that can withstand temperature fluctuations and varying light conditions. Modular sofas have emerged as the top choice for 2025, offering flexibility to reconfigure your space for different occasions. Look for pieces with removable, washable covers in natural fabrics like linen or cotton, which breathe well in warmer months.

Rattan and wicker furniture continues to reign supreme, but 2025’s interpretation favours sleeker, more contemporary designs. Choose pieces with clean lines and neutral cushions that can be easily swapped out seasonally. Avoid overly ornate traditional styles, which can make your conservatory feel dated.

Built-in bench seating along one wall maximises space whilst providing storage underneath. Add comfortable cushions and throws to create a cosy reading corner that takes advantage of natural light throughout the day.

Tables That Multitask

Coffee tables with storage compartments are essential for maintaining a clutter-free conservatory. Opt for pieces made from sustainable materials like reclaimed wood or bamboo, which align with 2025’s eco-conscious design trends. Nesting tables offer versatility, allowing you to expand surface space when entertaining and tuck them away when not needed.

Dining tables in conservatories work best when they’re appropriately scaled to the space. Round tables promote conversation and work well in smaller conservatories, whilst rectangular tables suit larger spaces and can double as work surfaces during the day.

Lighting Solutions for Every Hour

Layered Lighting Approach

Conservatories present unique lighting challenges due to their abundant natural light during the day and potential darkness at night. A layered lighting approach ensures your space remains inviting throughout all hours.

Pendant lights suspended from the ceiling create dramatic focal points whilst providing ambient lighting. Choose fixtures with adjustable heights to accommodate the varying ceiling heights typical in conservatories. Natural materials like rattan or bamboo shades complement the outdoor connection.

String lights remain popular but avoid the basic fairy light approach. Instead, invest in commercial-grade café lights with Edison bulbs for a sophisticated bistro atmosphere. These work particularly well when draped along the roofline or wrapped around structural elements.

Floor lamps with adjustable arms provide task lighting for reading whilst adding height variation to your furniture arrangement. Look for pieces that can withstand humidity and temperature changes common in conservatories.

What’s Out: Harsh Overhead Lighting

Avoid single, bright overhead fixtures that create harsh shadows and make the space feel more like a greenhouse than a living room. Similarly, overly decorative chandeliers can compete with the conservatory’s architectural features and feel out of place in this naturally-focused environment.

Colour Schemes and Decorative Elements

Nature-Inspired Palettes

2025’s conservatory colour trends draw heavily from natural palettes. Sage greens, warm terracotta, and creamy whites create a harmonious connection between indoor and outdoor spaces. These colours work beautifully with the abundant plant life that conservatories naturally accommodate.

Deep jewel tones like navy blue or forest green can anchor the space and provide sophistication, particularly when used in larger furniture pieces or accent walls. However, use these sparingly to avoid overwhelming the airy feel that makes conservatories so appealing.

Textile Choices That Endure

Natural fibres take centre stage in 2025 conservatory design. Jute, cotton, and linen offer both style and practicality, handling temperature fluctuations better than synthetic materials. Layer different textures to create visual interest without relying solely on colour.

Indoor-outdoor fabrics have improved dramatically and now offer the durability needed for conservatory use without sacrificing style. These materials resist fading, moisture and temperature extremes whilst maintaining the soft feel essential for comfort.

Flooring and Rugs: Foundation Elements

Practical Yet Beautiful Flooring

Your conservatory’s flooring needs to withstand temperature changes, potential moisture, and heavy foot traffic. Natural stone, ceramic tiles or luxury vinyl planks that mimic wood offer durability whilst maintaining style. Underfloor heating transforms these harder surfaces into comfortable options year-round.

Rug Selection Strategy

Large area rugs help define seating areas and add warmth to hard flooring surfaces. Choose rugs made from natural materials like jute, sisal or wool that can handle the unique conditions of conservatory living. Flat-weave styles are easier to clean and less likely to trap moisture than high-pile alternatives.

Layering smaller rugs creates visual interest and allows for easy cleaning or replacement. This approach also lets you experiment with patterns and textures without committing to one large, expensive piece.

Avoid delicate Persian or silk rugs, which can be damaged by temperature fluctuations and sun exposure. Similarly, very dark colours may fade unevenly over time.

Storage Solutions That Blend Seamlessly

Built-in storage maximises your conservatory’s potential without cluttering the visual space. Window seat storage, floating shelves, and integrated plant stands keep necessities within reach whilst maintaining clean lines.

Decorative baskets serve dual purposes, providing storage for throws, magazines or gardening supplies whilst adding texture and natural elements to your design scheme. Choose pieces that complement your colour palette and can withstand humidity changes.

Avoid plastic storage containers or temporary solutions that detract from the sophisticated atmosphere you’re creating. Instead, invest in beautiful storage pieces that enhance your overall design.

Bringing Your Vision to Life

Creating your ideal conservatory requires thoughtful planning and attention to the unique characteristics of this special space. Start with your largest pieces—seating and tables—then layer in lighting, textiles and decorative elements that reflect your personal style whilst embracing current trends.

Remember that your conservatory should feel connected to both your home’s interior design and your garden’s natural beauty. The most successful conservatory designs celebrate this unique position, creating a space that truly bridges indoor and outdoor living.

Transform your conservatory into the stunning living space you’ve always envisioned. Begin with one element—perhaps a beautiful new seating arrangement or a dramatic lighting fixture—and build from there. Your glass-wrapped sanctuary awaits its next chapter.

Further Reading: Make an Entrance: Your Guide to a Statement Hallway, Clever Ways to Use Mirrors in Your Home, How to Restyle Your Home Like an Interior Designer, Your Home Should Be Your Sanctuary

Follow Us on Instagram for Daily Inspiration 💙

Make an Entrance: Your Guide to a Statement Hallway

Often overlooked, the hallway is much more than just a path from one room to another. It’s the first impression your home makes, a welcoming space that sets the tone for everything that follows. Now, this transitional space is stepping into the spotlight, emerging as the design playground of choice for homeowners and interior enthusiasts alike.

Because a hallway is rarely a space to linger, it offers a unique opportunity to be bold. It’s the perfect canvas to test vibrant colours, striking patterned runners, epic feature lights, and elaborately tiled floors that might feel overwhelming in rooms where you spend more time.

Ready to transform your entryway from a simple corridor into a stunning statement? Discover how you can unleash your creativity and give your hallway the grand entrance it deserves.

Why Your Hallway Deserves the Spotlight

Think of your hallway as the opening chapter of your home’s story. It’s the first thing guests see and the space that welcomes you home each day. A well-designed hallway can instantly lift the mood, introduce your personal style, and create a seamless flow into the rest of your home. It’s a chance to experiment with design ideas you might shy away from in a living room or bedroom, making it a low-risk, high-reward project.

Embrace Bold Colours

One of the quickest and most effective ways to make a statement is with colour. Since hallways are often smaller spaces with limited natural light, many people default to neutral shades. But this is exactly why you should consider going bold.

Go Dark and Dramatic

Don’t be afraid of dark hues. Deep blues, rich greens, or even a sophisticated charcoal can create a cosy, cocooning effect that feels incredibly chic. These dramatic colours can make a narrow space feel more intimate and distinguished. When paired with good lighting and reflective surfaces like mirrors, a dark hallway can feel anything but small.

Play with Bright Hues

If dark and moody isn’t your style, why not go for something bright and cheerful? A splash of sunny yellow, a vibrant teal, or a playful coral can inject energy and personality into your entrance. You could paint the entire hallway for a full-impact look, or create a feature wall to draw the eye as you enter.

The Fifth Wall: Your Ceiling

Don’t forget to look up! Painting the ceiling—often called the “fifth wall”—is a fantastic way to add an unexpected pop of colour and character. A contrasting ceiling colour can make the space feel taller and adds a layer of design sophistication.

Lay the Groundwork with Flooring

Your hallway floor has to be practical, but that doesn’t mean it has to be boring. Flooring is a brilliant opportunity to introduce pattern, texture, and style right from the front door.

Patterned Tiles for Timeless Appeal

Victorian-style geometric tiles are a classic choice for a reason. They are durable, easy to clean, and add instant character and charm. Whether you opt for a traditional monochrome design or something more colourful, patterned tiles create a stunning focal point and a hard-wearing surface perfect for a high-traffic area.

The Power of a Runner

If new flooring isn’t an option, a runner is the perfect solution. It adds warmth, colour, and pattern while protecting the floor underneath. Choose a bold, graphic print to make a modern statement, or a traditional Persian-style rug for a touch of timeless elegance. A striped runner can also be a clever trick to make a narrow hallway appear longer.

Let There Be Light

Lighting is crucial in any room, but it’s especially important in a hallway, which can often lack natural light. The right lighting can transform the space from a dark passageway into a bright and inviting entrance.

Choose an Epic Feature Light

Make a dramatic statement with a show-stopping ceiling light. A large, sculptural pendant or a dazzling chandelier can become the centrepiece of your hallway, drawing the eye upwards and adding a touch of glamour. Consider the scale of your space; a high ceiling can handle a larger, more elaborate fitting, while a lower ceiling might suit a stylish semi-flush mount light.

Layer Your Lighting

Don’t rely on just one overhead light. Layering your lighting creates depth and ambience. Wall sconces can add a soft, welcoming glow and highlight artwork, while a slim console table with a stylish lamp can create a warm, inviting focal point.

Furnish for Function and Flair

Even the narrowest of hallways can accommodate some well-chosen furniture. The key is to select pieces that are both beautiful and functional.

The Versatile Console Table

A slimline console table is a hallway hero. It provides a surface for keys, mail, and a decorative lamp or vase of flowers, without taking up too much floor space. Look for designs with drawers or a lower shelf for extra storage to keep clutter at bay.

Smart Seating Solutions

If you have the space, a bench can be a practical and stylish addition. It offers a place to sit while putting on or taking off shoes and can provide hidden storage for footwear, bags, and other outdoor essentials.

The Magic of Mirrors

A mirror is a must-have for any hallway. It will bounce light around, making the space feel brighter and larger, and it’s perfect for that last-minute check before you head out the door. Choose a large, ornate mirror to create a grand statement, or group several smaller mirrors together for a more eclectic look.

Your Hallway, Your Statement

Your hallway is the perfect place to let your personality shine. It’s a space where you can be daring with your design choices and create an entrance that truly reflects your style. By embracing bold colours, interesting patterns, and statement lighting, you can transform a functional corridor into a beautiful and memorable part of your home.

Discover our full range of paints, lighting, and home accessories to start creating your own statement hallway today.

Further Reading: Clever Ways to Use Mirrors in Your Home, How to Restyle Your Home Like an Interior Designer, Your Home Should Be Your Sanctuary

Follow Us on Instagram for Daily Offers and Inspiration 💙

Clever Ways to Use Mirrors in Your Home

Mirrors are more than just functional décor. They have the unique power to transform spaces, amplify light, and create stunning visual effects. Whether you’re looking to illuminate a dim room, add depth to a small space, or make a bold design statement, mirrors are your go-to tool.

This blog explores clever ways to use mirrors in your home while offering practical interior design tips that will inspire you to reimagine your space.

Lighten Up Your Room

Struggling with a dark, shadowy room? Mirrors can work wonders by reflecting natural or artificial light throughout the space.

  • Position a mirror opposite or near a window to bounce daylight around the room.
  • Use mirrored furniture, such as console tables or cabinets, to subtly reflect light without overwhelming the décor.
  • Explore mirrors with metallic finishes, which further enhance the light-reflecting effect while adding a luxe touch.

The strategic placement of mirrors can brighten even the gloomiest corners, giving your room a vibrant and airy feel.

Brighten a Hallway

Hallways are often narrow and poorly lit, but mirrors can help you turn this overlooked area into an inviting space.

  • Hang a long, horizontal mirror along one wall to stretch the perception of space.
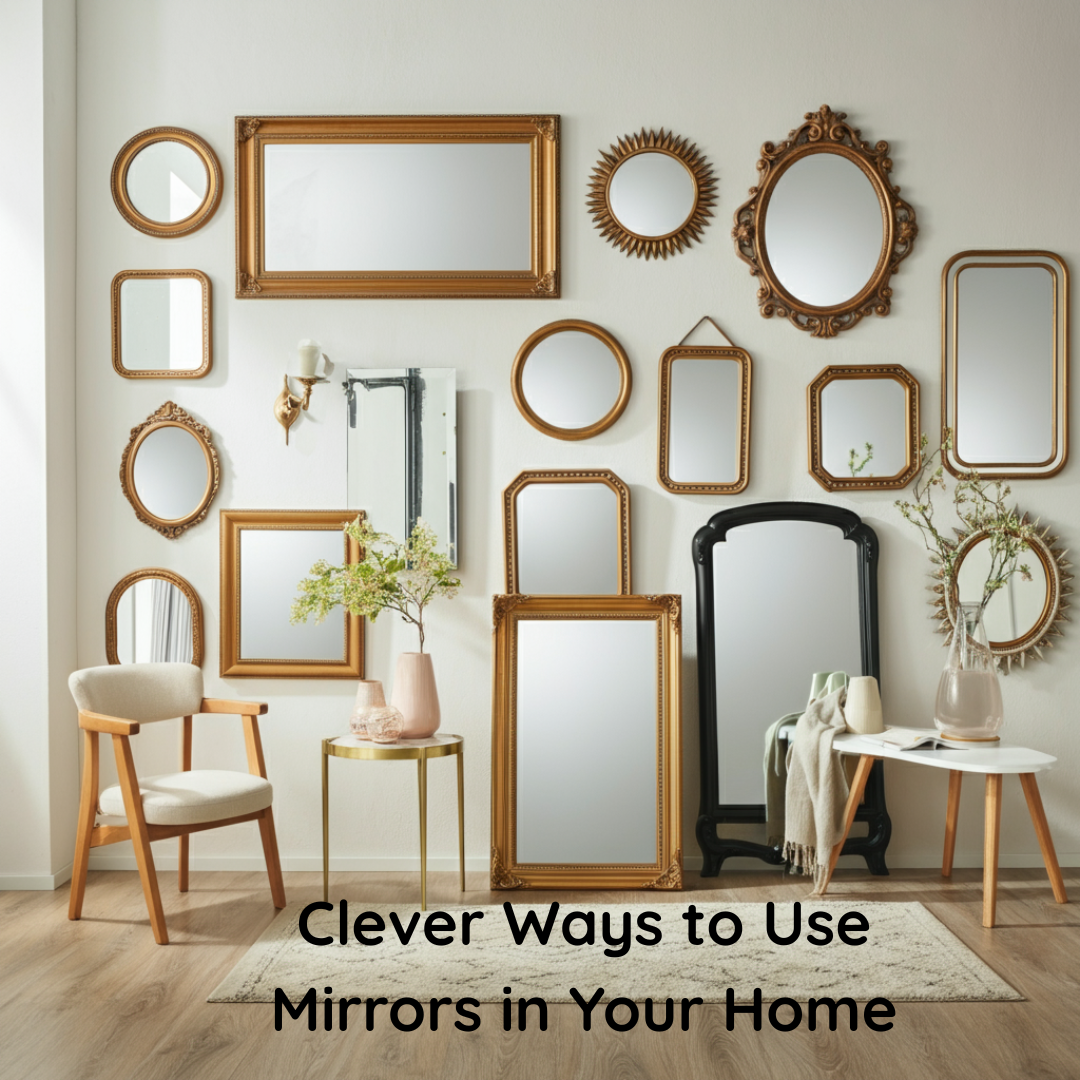
  • Place multiple smaller mirrors in a gallery-style arrangement for an eclectic, eye-catching design.
  • Install LED lights around a mirror for a contemporary illuminated effect.

These small adjustments can make a significant impact, turning your hallway into a standout feature of your home.

Enhance Ambiance with Floor-Standing Mirrors

Floor-standing mirrors don’t just offer practicality; they double as timeless statement pieces for your décor.

  • Place a full-length mirror in a bedroom or dressing area to combine elegance with utility.
  • Prop a vintage or oversized mirror against a wall in your living room for a relaxed yet sophisticated touch.
  • Use mirrors with decorative frames to complement your existing style, from rustic wood to sleek metal.

The grandeur and versatility of floor-standing mirrors instantly elevate any space they’re in.

Add Charm with Statement Mirrors

Why settle for ordinary when you can make a bold statement? Statement mirrors are an excellent way to inject personality into your home.

  • Consider shapes beyond the standard square or rectangle. Circular, hexagonal, or abstract mirrors can introduce an architectural element to the room.
  • Opt for ornate frames or unconventional materials like rattan, brass, or coloured glass.
  • Hang statement mirrors over consoles, vanities, or dining tables for maximum impact.

A thoughtfully chosen statement mirror can become the focal point of your room.

Transform Alcove Areas

Alcoves and recesses are often underutilised, but mirrors can breathe life into these spaces.

  • Install a mirror at the back of an alcove to enhance depth and showcase decorative items.
  • Use mirrored tiles for a modern, textured look that adds subtle interest to your design.
  • Combine mirrors with lighting, such as wall lamps, to create a layered, cosy effect.

With a bit of creativity, alcove areas can become exciting design features rather than overlooked nooks.

Create a Faux Window Effect

Dreaming of more windows? Mirrors can give the illusion of additional ones, enhancing the feeling of openness in your home.

  • Use mirrors with grids or frames that mimic window panes for a realistic effect.
  • Position the mirror to reflect outdoor elements, such as trees or gardens, creating the impression of an extended view.
  • Choose large mirrors with naturalistic frames to blend seamlessly with your décor.

This trick is ideal for rooms with limited windows, instantly making them feel larger and airier.

Elevate Your Fireplace

A mirror positioned over a fireplace adds an undeniable touch of elegance and draws the eye upward, creating a sense of height.

  • Opt for an antique mirror or one with a decorative frame to maintain the cosy charm of a traditional fireplace.
  • For modern interiors, a sleek, frameless mirror can amplify light and create a polished look.
  • Bring seasonal flair by placing smaller decorative items, such as candles or vases, on the mantel to complement the mirror.

This simple addition transforms your fireplace into a dynamic feature that commands attention.

Make Small Spaces Feel Bigger

Perhaps one of the most well-known uses for mirrors is their ability to make small spaces appear larger.

  • Place a large mirror on a wall opposite a door or window to create the illusion of depth and space.
  • Use mirrored wardrobes in bedrooms for a functional and sleek storage solution.
  • Create verticality by hanging mirrors close to the ceiling or in tall, narrow shapes to draw the eye upward.

Mirrors create a sense of expansiveness, helping you maximise even the smallest of areas in your home.

Tips for Styling Mirrors in Your Home

When incorporating mirrors into your home décor, consider these interior design tips for a cohesive look:

  • Match the scale: Choose mirror proportions that complement the size of your space.
  • Mind the reflection: Ensure that what the mirror reflects is visually appealing, like an artistic arrangement or a beautiful view.
  • Frame it right: Select frames that match the overall aesthetic of your room for a harmonious feel.
  • Layer with lighting: Pair mirrors with thoughtfully placed lighting to maximise their impact.

Reflect Your Style with Mirrors

Mirrors are one of the most versatile and stylish additions to any home. From brightening dark spaces to creating the illusion of depth, they offer both aesthetic and functional benefits. Whether you’re working with a compact studio or sprawling home, there’s a creative way to incorporate mirrors into your décor.

Feeling inspired to refresh your interiors? Start with your favourite ideas and experiment to see how mirrors can transform your space.

Our Mirrors can be found here.

Further reading: How to choose the perfect mirror for your home

Follow us on Instagram for Daily Inspiration

How to Restyle Your Home Like an Interior Designer

Ever walked into a beautifully styled room and wondered, “How did they pull this together?” Interior designers have an incredible knack for creating inviting, cohesive spaces that feel like they belong in a magazine—but what if you could achieve the same look on your own?

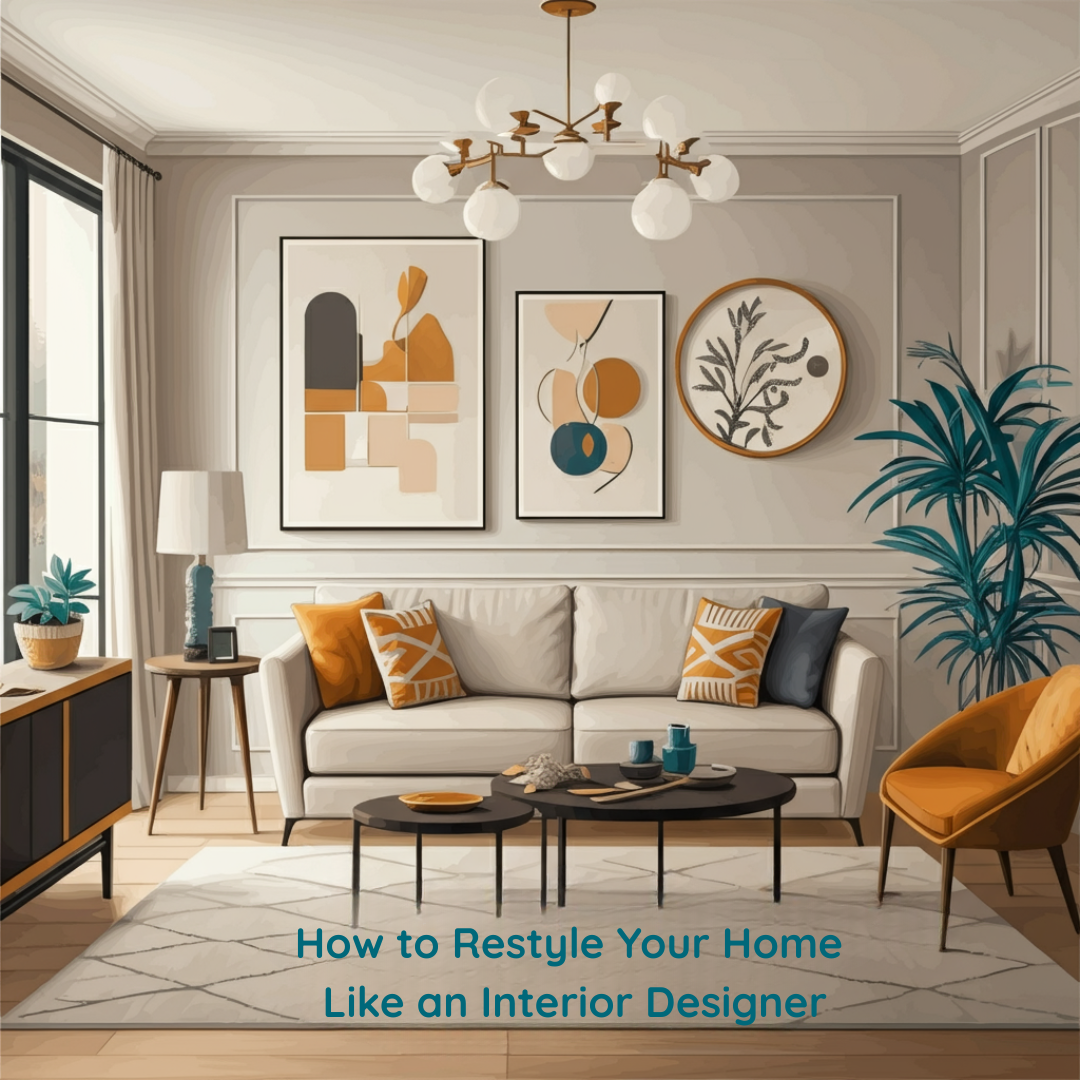
Image of a room with sofa - part coloured and actual and part as sketch traced drawn form.

Good news! You can. With a little guidance, you’ll be reimagining your home like a pro. This guide will walk you through the essential steps to transform your space and give it that professionally styled touch. Expect expert tips on choosing colours, fabrics, finishes, and much more.

Plan Your Vision

Restyling your home starts with inspiration. Designers never start a project without a clear plan, and you shouldn’t either.

Find Inspiration

Whether you’re drawn to minimalist aesthetics or dramatic, statement-making interiors, start by gathering ideas to define your style.

  • Scroll, Swipe, Save: Platforms like Pinterest and Instagram offer endless design inspiration. Follow accounts of your favourite designers or search for hashtags like #InteriorDesignIdeas and #HomeStylingTips.
  • Create a Scrapbook: Go old-school by clipping pages from design magazines or printing out images you love. Having a physical reference can help you refine your vision.
  • Seek Trends: Explore design blogs and reels for emerging trends. Are muted earth tones calling your name? Or perhaps you’re drawn to bold, maximalist looks?

Mood Boards and Sketching

Once you’ve gathered ideas, translate them into a mood board. Apps like Canva make it easy to combine your favourite colours, textures, and furniture pieces into a virtual concept that keeps you on track. Want to go hands-on? A quick pencil sketch can help you visualise the flow of your space.

Pick the Right Colour Palette

Keep It Cohesive

The colour palette you choose will set the tone for the entire room. Designers suggest one main colour, one secondary colour, and one or two accents.

  • Muted Tones: Earthy shades like sage green and soft terracotta lend a calming and natural feel.
  • Bold Colours: Jewel tones like emerald green or deep navy create drama and sophistication.
  • Bright Pops: If you’re aiming for a cheerful space, go for sunny yellows or vibrant corals paired with neutrals.

Tip! Paint sample cards are your best friend. Always test colours on your wall before committing, as natural lighting can dramatically change their appearance.

Build Layers

Don’t stop at walls. Use colours across fabrics, furniture, and accessories to layer your space. Scatter cushions, throws, and rugs can incorporate accent tones beautifully.

Focus on Fabrics

Fabrics bring a tactile element to a room, introducing comfort and personality.

Experiment with Patterns and Textures

Mixing patterns is a hallmark of designer interiors—but there’s a method to the madness. Pair a bold geometric pattern with a soft floral or balance a busy fabric with a simple plain.

Natural fabrics, like linen and cotton, are classic choices for upholstery and curtains. They not only look chic but are durable and timeless, making them worth the investment. Velvet or leather can be added in small doses for an element of luxury.

Don’t Overlook Finishes

When it comes to finishes, the devil is in the details. You’d be surprised how the sheen of a surface or the type of hardware can elevate a room from standard to stunning.

  • Shiny Polishes: Chrome and mirrored finishes create a modern, sleek look ideal for contemporary spaces.
  • Earthy Details: Natural woods and matte textures feel grounded and warm, perfect for rustic or Scandinavian-inspired rooms.
  • Mix Metals: Designers love mixing metals like brass, brushed nickel, or black iron. This approach adds depth to the design while keeping it dynamic.

Consider upgrades to everyday fixtures like light switches, cabinet handles, and taps. Small changes can have a big impact!

Design Around Key Concepts

Interior designers often work with overarching concepts to keep their projects balanced. You can do the same by making decisions through the lens of colours, fabrics, materials, and finishes. Regularly check your choices against your mood board to ensure harmony.

Bring It All Together

Now it’s time to tie your room together with carefully chosen elements.

Flooring

Your flooring makes a big statement in any room. Light woods like oak can brighten a space, while darker tones bring richness. Alternatively, rugs provide an easy way to introduce texture, pattern, or additional colour.

Hardware

Swapping out hardware on furniture and cabinetry is an affordable way to modernise existing pieces. Look for unique knobs, handles, and latches to add personality.

Lighting

Don’t just rely on ceiling lights. Layer your lighting with a mix of table lamps, floor lamps, and wall lights to create a welcoming glow. Designers also recommend warmer bulbs for a cosy ambience.

Accessories and Styling

Here’s where your flair for creativity can shine! Use decorative elements like books, vases, pottery, or even plants as finishing touches. Group these items in odd numbers and vary the heights for visual interest.

Artwork

A well-placed piece of art can be the focal point of a room. Your wall doesn’t have to host a museum-worthy piece. Affordable prints or even personal photography can make just as much impact. Ensure you hang pieces at eye level and consider oversized options to anchor bare walls.

Create a Home That Feels Uniquely Yours

Restyling your home like an interior designer doesn’t mean mimicking someone else’s style. It’s about exploring designs you love and tailoring them to your lifestyle, needs, and personality. Break your project into manageable steps—from defining your vision and selecting colours to layering fabrics and finishes for a polished look.

And remember, you don’t need to transform your entire home at once. Start with one room and build from there. Before you know it, every corner of your home will exude designer flair.

Further Reading: Your Home Should Be Your Sanctuary, Illuminate Your Space with Statement Lighting, Grounding Colours in Interior Design: Transform Your Space with Calm and Balance, Interior Design Trends for 2025

Follow us on Instagram for Daily Inspiration

Translate »